People frequently ask what my style is. Most times I answer the question by giving them the link to my blog and telling them to define it in their own words. My goal, is to create simple, clean, emotional, and timeless imagery. When I press the shutter, I am creating the image then and there. What I do when I am in front my computer, is simply to “finish” the image. I also have a very simple approach when it comes to finishing my images. 99% of my images are in “straight” color or black and white. You can venture through the pages of my blog and see how I got to where I am today and while I am slowly tweaking my processing style, my intent will remain the same. While style’s change over the years, I simply want my images to remain timeless.
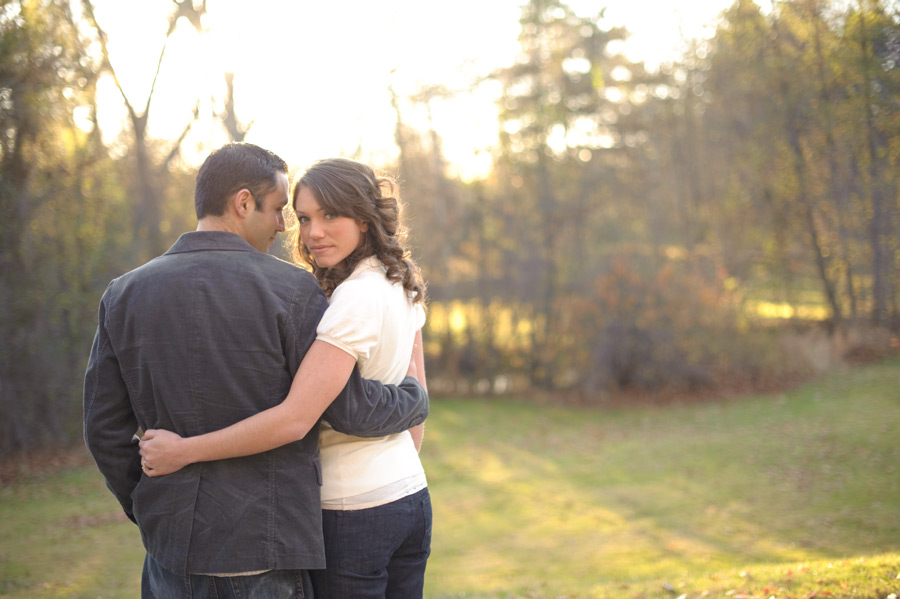
With that said, there are basically three steps in the process with the final one being the one of the images you see on my blog as well as what anyone who orders a print receives. The first step would be straight out of camera. Personally, I do almost everything manually. I shoot in manual mode, selecting the aperture, shutter speed and ISO. I choose the white balance for the current lighting environment and I also select one of the 51 AF points my camera has to have the camera automatically focus on, but only when I press a separate button to activate the autofocus. I then press the shutter button and voila, I have created an image or if you prefer, I have captured a moment in time. Here is an image from Cara + Joe’s Engagement session straight out of camera (SOC).
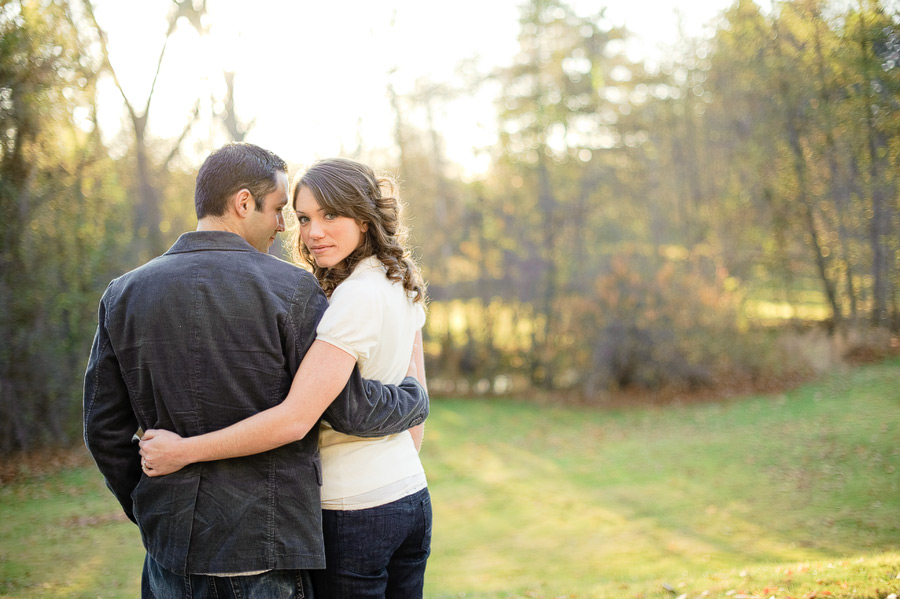
The second step is the “proofing” step. This is adjusting things such as; color, contrast, exposure, highlights and shadows. This gets the image most of the way there. These are the images that will be viewed in a gallery from an engagement session or a wedding and delivered to the client. I also refer to these as Digital Negatives. Here is the image in proof form…
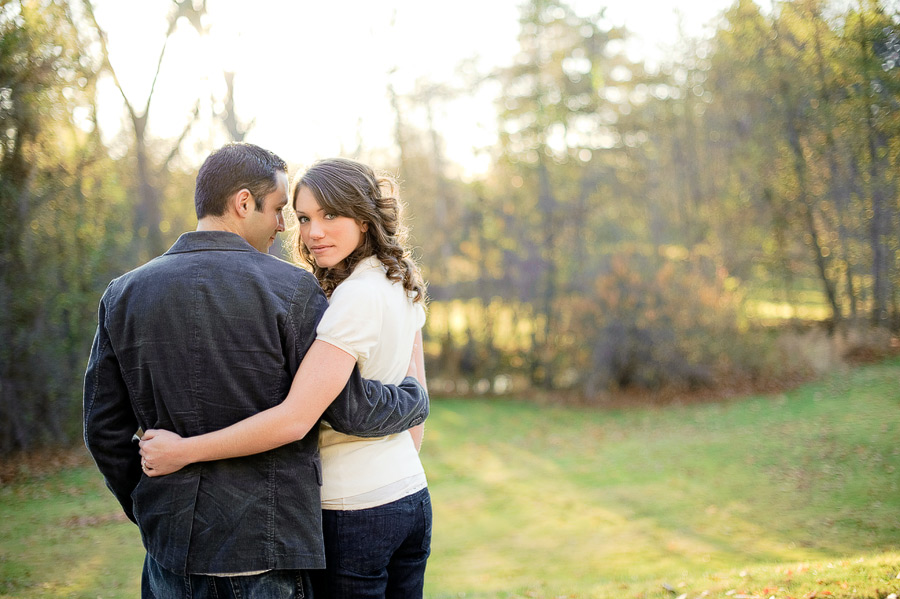
The final step is my favorite and most fun to do…to FINISH the image for however it’s going to be displayed. With this step, things like; eyes, skin, specific colors, and sharpness are all adjusted. Every image ordered, receives these types of adjustments and each image is even sized and sharpened based on the print size ordered, to make sure it looks great! Here is the final web or print form of the image…
Here’s another image. Straight our of camera…
Proof form…
And in print form. I converted the image to black and white to help keep the viewer focused on the emotion of the image. I will also convert images to black and white if there are distracting colors in the image. I frequently convert recessional, first dance and other images with a bit more emotion to black and white.
Straight out of camera…
Proof form…
And in final print/web form…
One last one for now. Straight out of camera…
Proof…
Final…
I will try and do one of these every couple months. 🙂

.jpg)


Dennis Bullock - Great post Dustin! I would love to know the action mixes that you most use on the final images.
michele bowman - LOVELY!!! you do a beautiful job, and they don’t look over-processed by any means.
Andy Owen - That really is cool! My favorite was the last! Seeing the original raw image I’m surprised you were able to pull as much information into the final as you did! Beautiful!
Christina - Great post. Thanks!
Gail - You are wicked talented with Photoshop man! Love your clean, natural style. The more I do this, the more I believe in that very thing myself: To be CONSISTENT with your images! Clients DEFINITELY pick up on that!
Brian - Dustin, Thanks so much for this. Your work is inspiring. Your images have so much energy to them. I like how your images are always so bright and your skin tones are beautiful. I look forward to future posts!!!
Paul - Huge fan of your work–love the before and after–you should do more! Always good to see some behind the scenes type stuff for a good photographer.
Genevieve McKeiver - THANK YOU,THANK YOU, THANK YOU for posting this. It’s nice to see that your pictures don’t turn out absolutely PERFECT straight out of the camera, they actually look similar to mine (but better of course 🙂 ) So many times I look at other photographers pictures and wonder how it looks out of the camera. This makes me feel better. Thanks for this wonderful post. Now is the next one going to tell me how to achieve a look similar to yours 🙂
Tina - Love this post! I am lovin’ your Photoshop skills and love the way you post process – these images are amazing! Awesome work:)